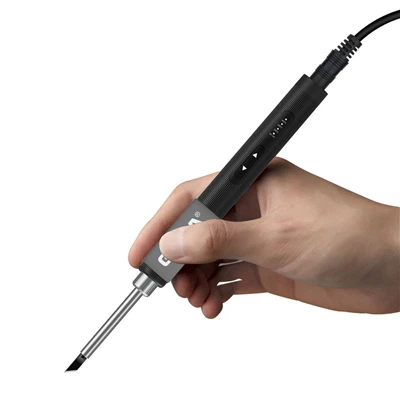
Some pointers for using a welding iron and other welding equipment
Manual soldering process:
1. Check before operation
(1) Insert the electric soldering iron plug into the specified socket 3-5 minutes before welding, and check whether the soldering iron is hot. If it is not hot, first check whether the socket is plugged in. Report, do not disassemble the soldering iron at will, let alone directly touch the soldering iron tip with your hands.
(2) Soldering iron tips that have been oxidized and uneven or have hooks should be updated:
1), can ensure good heat conduction effect;
2) To ensure the quality of the welded object. If a new soldering iron tip is replaced, the maintenance paint should be wiped off after heating, and tin maintenance should be added immediately. The cleaning of the soldering iron should be carried out before the soldering operation. If the soldering iron is not used for more than 5 minutes, the power must be turned off. The sponge needs to be cleaned. Dirty sponges contain metal particles, or sponges containing sulfur will damage the tip of the soldering iron.
3) Check whether the tin-absorbing sponge has water and is clean. If there is no water, please add an appropriate amount of water (the appropriate amount means that water will seep out when the sponge is pressed to half the normal thickness. The specific operation is: humidity requirements After the sponge is completely wet , hold it in the palm of your hand, and close your five fingers naturally), the sponge should be cleaned, as dirty sponges contain metal particles, or sponges containing sulfur will damage the tip of the soldering iron.
4) Whether the human body and the soldering iron are reliably grounded, and whether the human body wears an electrostatic ring.
2. Welding steps
The specific operation steps of soldering iron welding can be divided into five steps, which is called the five-step engineering method. To obtain good welding quality, it must be strictly operated as shown in Figure 5.
Soldering according to the above steps is one of the keys to obtain good solder joints. In actual production, the most likely violation of the operation steps is that the soldering iron tip is not in contact with the welded part first, but with the solder wire first, and the molten solder drops on the unpreheated part to be welded. In this way, it is easy to cause false welding of solder joints, so the tip of the soldering iron must be in contact with the workpiece to be welded. Preheating the workpiece to be welded is an important means to prevent false welding.
3. Welding essentials
(1) The contact method between the soldering iron tip and the two parts to be welded
Contact position: The soldering iron tip should be in contact with the two welded parts (such as solder feet and pads) to be connected at the same time. The soldering iron is generally inclined at 45 degrees, and should avoid contacting only one of the welded parts. When the heat capacity of the two welded parts is very different, the inclination angle of the soldering iron should be adjusted appropriately. The smaller the inclination angle between the soldering iron and the welding surface, the larger the contact area between the welded part with the larger heat capacity and the soldering iron will be, and the heat conduction capacity will be enhanced. For example, the inclination angle of LCD pull welding is about 30 degrees, and the inclination angle of welding microphones, motors, speakers, etc. can be about 40 degrees. Two parts to be welded can reach the same temperature in the same time, which is considered as an ideal state of heating.
Contact pressure: When the soldering iron tip is in contact with the workpiece to be welded, a slight pressure should be applied. The strength of heat conduction is proportional to the applied pressure, but the principle is to not cause damage to the surface of the welded piece.
(2) Supply method of welding wire
The supply of welding wire should be mastered in three ways, namely supply time, location and quantity.
Supply time: In principle, the solder wire is sent immediately when the temperature of the weldment reaches the melting temperature of the solder.
Supply position: It should be between the soldering iron and the welded part and as close to the pad as possible.
Supply quantity: It depends on the size of the weldment and the pad. After the solder covers the pad, the solder can be higher than 1/3 of the diameter of the pad.
(3) Welding time and temperature setting
A. The temperature is determined by the actual use. It is most suitable to solder a solder point for 4 seconds, and the maximum is no more than 8 seconds. Usually observe the tip of the soldering iron. When it turns purple, the temperature setting is too high.
B. For general in-line electronic materials, set the actual temperature of the soldering iron tip to (350~370 degrees); for surface mount materials (SMC), set the actual temperature of the soldering iron tip to (330~350 degrees)
C. For special materials, the temperature of the soldering iron needs to be specially set. FPC, LCD connectors, etc. should use silver-containing tin wire, and the temperature is generally between 290 degrees and 310 degrees.
D. When soldering large component feet, the temperature should not exceed 380 degrees, but you can increase the power of the soldering iron.
(4) Precautions for welding
A. Before welding, observe whether each solder joint (copper skin) is smooth and oxidized.
B. When welding items, be sure to look at the welding point to avoid short circuit caused by poor welding of the line
4. Check after operation:
(1) After using the soldering iron, wipe off the remaining tin on the tip of the soldering iron with a sponge.
(2) After get off work every day, the tin beads, tin slag, dust, etc. on the soldering iron stand must be cleaned, and then the soldering iron is placed on the soldering iron stand.
(3) Put the cleaned electric soldering iron on the upper right corner of the workbench.