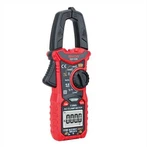
8 Operating Methods for a Multimeter
1. Measure the DC current with a multimeter connected in series to the circuit under test, and set the measurement selector switch to the desired mA level. When measuring direct current from 500mA to 5A, insert the positive probe into the 5A dedicated socket. 2. Measure the DC voltage multimeter and connect it to both ends of the measured voltage. Set the measurement selector switch to the desired DC V gear. When measuring DC voltage from 1000V to 2500V, insert the positive probe into the dedicated 2500V socket. 3. Measure the AC voltage multimeter and connect it to both ends of the measured voltage. Place the measurement selector switch in the desired AC V gear. When measuring DC voltage from 1000V to 2500V, insert the positive probe into the dedicated 2500V socket. 4. Measure the resistance and select the appropriate Ω gear. First, calibrate the ohm gear to zero, and then proceed with the measurement. After each gear change, recalibrate the zero. 5. Set the selection switch for measuring audio level to the AC "10V" position. 6. Set the capacitance measurement selection switch to the AC "10V" position, connect the measured capacitance C in series with a multimeter, and then connect it to the 10V AC voltage circuit. 7. Measure the inductance by placing the selection switch in the AC "10V" position. Connect the measured inductance L in series with a multimeter and then connect it to the 10V AC voltage circuit. 8. Set the transistor amplification measurement selection switch to the "ADJ" position for calibration, and then to the "hFE" position. Insert the tested transistor into the transistor socket on the multimeter. Have you understood the above 8 usage methods? If you are still confused, let me continue reading and explain its basic usage: before using a multimeter, you should first prepare for battery installation, plug in the probe, zero adjustment, etc., and then select the gear and range according to the measurement object. Attention should also be paid to preventing reading errors during measurement. 1. School Zero
Before using the instrument, it should be checked whether the pointer has returned to zero. If it is stationary on the leftmost "0" scale line, it is normal. If it is not available, adjustments need to be made. You can use a small screwdriver to slowly rotate the mechanical zero adjuster under the meter head until the pointer indicates normally before use (refer to the following figure).