DIY Soldering Iron Thermometer
The electric soldering iron thermometer is composed of a temperature sensing line and an instrument.
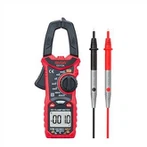
It is very convenient if you have a digital multimeter on your hand that can measure temperature, and the probe is a thermocouple. Because generally this thermocouple is also K-type, just connect the output of the temperature-sensing line directly to the temperature input of the multimeter! The temperature is displayed directly.
If the digital multimeter in your hand cannot measure the temperature, you can only use its 200mV range to measure the voltage, and then look up the table to convert it into a temperature value.
The temperature-sensing line can use a white light 191 thermometer, and only one is needed. The temperature sensing line is a consumable material, and it needs to be replaced after about 50 times of use to ensure the accuracy, so it is easy to buy.
The temperature-sensing line is the trademark shape of Mercedes-Benz. There is a temperature-sensing block in the middle, which leads to three lines, and a circle at the end is used to connect to the terminal. In fact, it is made of two wires, the red sleeve is the positive wire, the blue sleeve is the negative wire, and there is a side where these two wires are entangled together. It is not used as a signal wire, but mainly used as a support, because three The sides can be supported firmly.
The main job is to make a shelf for the temperature sensing line.
Buy 3 binding posts. When the thread of the terminal is larger than the circle of the lead-out wire of the temperature-sensing wire, remove the small circle of the lead-out line, and then make a large circle according to the thread size of the terminal again.
Take another scrap circuit board and use an electric drill to drill three holes of a good size, exactly a triangle, and install the terminal on the circuit board. Then connect the three legs of the temperature sensing line to the threads of each terminal post, and tighten the nuts. Then solder the wires to the multimeter and you're good to go. As shown in the picture:
When measuring temperature, put some tin on the tip of the soldering iron first, and then place it on the temperature-sensing block in the middle of the temperature-sensing line. The temperature sensing block can be tinned, so it can fully contact with the tip of the soldering iron, and the measured temperature is more accurate. At this time, the temperature measurement file of the multimeter directly displays the temperature.
If the voltage mV value is measured, use the following conversion table to convert the voltage into a temperature, and add the room temperature to the temperature of the soldering iron tip. For example, 12.6mV is 310°C, plus room temperature such as 30°C, the temperature of the soldering iron tip is 340°C.
In addition, it is possible to directly use the thermocouple of the multimeter to touch the tip of the soldering iron without using the temperature sensing line, that is, the thermocouple of the multimeter is not tinned, so it cannot be completely in contact with the tip of the soldering iron, and it will be slightly lower than the temperature measured by the temperature sensing line , but generally only about 2-5°C lower.