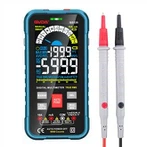
Explanation of the method of using a multimeter as an ohmmeter
1. Zero the measurement first
Touch the two probes directly (short circuit), adjust the dial - the zero ohm adjuster below to correctly point the pointer at zero ohm. This is because the power supply voltage provided by the internal Dry cell will decrease as the service time increases. When Rx=0, the pointer may not reach full bias. At this time, the Rw must be adjusted to reduce the shunt current of the meter head to meet the requirements of full bias current Ig.
2. Choose the appropriate range
In order to improve the accuracy of testing and ensure the safety of the tested object, it is necessary to select the appropriate range range correctly. When measuring resistance, it is required that the pointer be within the range of 20% to 80% of the full scale, so that the testing accuracy can meet the requirements.
Due to different range ranges, the test current flowing through Rx also varies in magnitude. The smaller the range, the greater the test current, otherwise the opposite is true. So, if the small range ohmic range RX1 and RX10 of a multimeter are used to measure the small resistance Rx (such as the internal resistance of a milliammeter), a large current will flow on Rx. If the current exceeds the current allowed by Rx, Rx will burn or bend the pointer of the milliammeter.
Therefore, when measuring resistance that does not allow large currents to pass, the multimeter should be placed on the ohmic range of a large range. At the same time, the larger the range, the higher the Dry cell voltage connected to the internal resistance. When measuring resistance that cannot withstand high voltage, the multimeter should not be placed on the ohmic range of a large range. When measuring the inter pole resistance of a diode or transistor, the ohm range should not be set to Rxl0k, otherwise it may easily cause inter pole breakdown of the tube. Only lower the range range and let the pointer point at the high resistance end. As previously pointed out, the resistance scale is non-linear, and the scale at the high resistance end is very dense, which can easily increase the error,
3. Precautions
(1) When used as an ohmmeter, it is internally connected to the negative pole of the Dry cell, and the black probe is connected to the positive pole of the Dry cell. For the external circuit, the red probe is connected to the Dry cell.
(2) When measuring a large resistance, hands should not touch both ends of the measured resistance at the same time to avoid parallel connection between the human body resistance and the measured resistance, which may result in incorrect measurement results and greatly reduce the test value. In addition, when measuring the resistance on a circuit, the power supply of the circuit should be cut off. Otherwise, not only will the measurement result be inaccurate (equivalent to connecting an external voltage), but it will also cause large current to pass through the microampere meter head, causing the meter head to burn out. At the same time, one end of the measured resistance should be soldered off the circuit before measurement, otherwise the total resistance of the circuit at that two points will be measured.
(3) After use, the range switch cannot be placed on the Ohm range. In order to protect the micro ampere meter head and avoid accidentally burning it during the next measurement. After the measurement is completed, turn the range switch to the maximum range position of DC voltage or AC voltage, and never put it on the ohm scale to prevent the internal Dry cell from being exhausted when the two probes are short circuited.