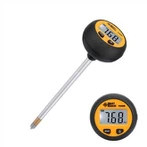
How to measure a breakpoint with an electronic test pen
Everyone should be familiar with the electronic test pen. On this test pen, there are two metal blocks. The one near the top is written "direct detection", and the one below it is written "inductive breakpoint test".
When measuring, press and hold the metal block that says "Induction Breakpoint Test" with your hand, and the tip of the electric pen touches the insulation layer of the wire, and at the same time observe the information on the display screen. If there are numbers on the display, it proves that the circuit is normal. If there is only a lightning symbol on the display without any numbers, it proves that there is an open circuit in this place.
Sometimes the wires are buried in the wall, which is inconvenient for induction measurement, but it doesn't matter. Spend an extra 10 yuan and buy an electronic test pen with an indicator light like the one pictured above (the circle under the display is the indicator light).
When measuring, find the first and last ends of the line to be tested, take a wire that is confirmed to be normal (auxiliary wire - if the distance between the first and the last ends is relatively close, people can touch it as soon as they reach out), and connect it to the end of the line to be tested end. Pull this auxiliary wire to the first end of the wire to be tested. Touch the conductor in the auxiliary wire with one hand, touch the "direct detection" metal block of the electric pen with the other hand, and touch the first end of the line to be tested with the tip of the pen.
If the indicator light of the electric pen is on when touching, it proves that there is no problem with the circuit; if it does not light up, it proves that there is a break in the circuit.