How to use a multimeter to directly detect a proximity switch
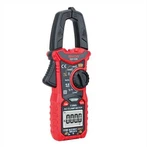
Firstly, the three wire proximity switch is widely used. The output is divided into two types: NPN and PNP. A three wire proximity switch requires an additional power source to operate, so it needs to be powered on before measurement. Generally, the brown wiring is connected to 12-24VDC, the blue wiring is connected to 0V, and the black wiring is for signal output. We connect the wires and turn on the power, then place something in front of the proximity switch as close as possible. If the proximity switch detects an object, its output indicator light will light up. The prerequisite for this is that you need to know what this proximity switch is detecting. If you don't know, you can try several objects, such as metal, magnets, etc. If all of these have been tried and the indicator light is not on, then you can use a multimeter to measure. It doesn't matter what type of proximity switch it is, just measure the signal line and the voltage of 24V or 0V to see if there is any voltage. If there is no voltage, it means that the proximity switch is faulty. If the indicator light is on, it's good and there's no need to measure.
Secondly, there are two wire proximity switches that do not require additional power, but are also divided into two types of connections. The measurement method is basically the same as the three line method. The colors of the two wires are usually brown and blue. The first connection method is to connect the blue wire to 0V and the brown wire to the signal. It is still advisable to approach the proximity switch with an object. If the proximity switch is functioning properly, the indicator light will turn on. If it does not turn on, a multimeter can be used for measurement. Measure whether there is voltage between the signal line and the 24V voltage. No, it's bad. Another method of connection and measurement is exactly the opposite.


