Introduction to how to use a sound level meter
Sound level meter, also called noise meter, is an instrument used to measure the sound pressure level or sound level of sound. It is the most basic and important instrument in acoustic measurement. With the development of the national economy and the improvement of people's material and cultural living standards , noise census and environmental protection work have been carried out in an all-round way. The machine manufacturing industry has regarded noise as one of the important quality indicators of products. Buildings such as auditoriums and gymnasiums not only require beautiful appearance, but also pursue acoustic effects. These all make the application of sound level meters increasingly widespread.
How to use a sound level meter:
1. Selection of sound level meter usage environment: Choose a representative testing location. The sound level meter should be away from the ground and away from the wall to reduce the additional impact of reflected sound from the ground and walls.
2. Weather conditions require that the sound level meter should keep the microphone diaphragm clean when there is no rain or snow. A wind cover must be installed when the wind is above Level 3 (to avoid wind noise interference). Measurement should be stopped for strong winds above Level 5.
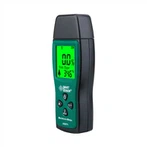
3. Open the sound level meter carrying case, take out the sound level meter, and put on the sensor.
4. Place the sound level meter in A state, test the battery, and then calibrate the sound level meter.
5. Use the comparison table (common environmental sound level reference) to adjust the measurement range.
6. Next, you can use fast (measure the instantaneous value in an environment where the sound pressure level changes greatly), slow (measure the average value in an environment where the sound pressure level does not change greatly), pulse (measure the pulse sound source), filter ( Measure the sound level of the specified frequency band) various functions for measurement.
7. Record data as needed, and you can also connect to a printer or other computer terminal for automatic collection. Organize equipment and return it to designated place
How to use a sound level meter:
1. Use a sound calibrator to check the calibration of the sound level meter.
2. Set the range switch to the appropriate position according to the size of the sound being measured. If the size cannot be estimated, set it to "85-130"
3. Set the time weighting switch to the position specified by the standard; when the sound level is relatively stable, set it to "F" (fast); when the sound level changes drastically, set it to "S" (slow)
4. Set the reading mark switch to "5S" or "3S"
5. Turn the power switch to "on"; the instrument will display numbers when it starts working.
6. If the oversize mark "▲" (the undersize mark "▼") is displayed on the right end of the display, the range switch should be moved up or down to make the range mark disappear. If the range mark cannot disappear, the measured sound level exceeds the measuring range of the instrument.
7. After adjusting the range of the sound level meter, you can read the measurement results from the display.
8. Keep measurement records
9. After the measurement is completed, it is recommended to use a sound calibrator to check the sensitivity of the sound level meter to ensure the accuracy and reliability of the measurement data.
10. Turn the power switch to "Off". If the instrument is not going to be used for a long time, be sure to remove the battery.