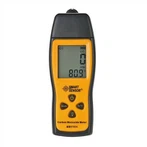
Issues with and Remedies for the Coating Thickness Gauge
The coating thickness gauge is a non-destructive instrument used to detect the thickness of the coating on the surface of various metal materials. During the use of the user, sometimes there will be some abnormalities. Sometimes these abnormalities can be handled by ourselves. According to the long-term Since the application experience of the coating thickness gauge, let's talk about the common faults and treatment methods of the coating thickness gauge.
1. The instrument does not turn on
①Please check whether the battery is charged or replace it with a new one.
②Please check whether the battery is in good contact, and the electrode sheet is not oxidized or rusted (if rusted, use a tool to scrape off the oxide layer).
③Please check whether the button is pressed in place, and the button is normally elastic.
④Other host circuit failure, consult the company's after-sales service or return to the factory for repair.
2. The instrument measurement is not accurate
① Please calibrate the instrument systematically first, and calibrate it so that it meets the error range. The error follows ≦3% (thickness value). If you need to test more, please perform system calibration on the smooth bare base (uncoated base) of the workpiece under test.
②Please check whether the front end of the probe is worn, deformed, has attached substances, etc., and whether the outer sheath of the probe is not level, etc. The deformation can be properly corrected by sandpaper and cleaned.
③ The influence of the surface roughness of the base material of the measured piece causes systematic errors and accidental errors. During measurement, increase the number of measurements at different positions to overcome accidental errors. Or use sandpaper to polish the substrate and re-calibrate the zero point of the instrument.
④Measurement method and placement of the probe, keep the probe vertical to the sample during the test
⑤The curvature of the tested part should be recalibrated under the radius of curvature that the probe is suitable for. Especially on the convex surface of the pipe, pay attention to the stable placement of the V-shaped slot of the probe.
3. The instrument cannot measure
① Check whether the probe is well connected and inserted in place.
② Check whether the probe line is broken, and focus on the probe connector (the connector can be unscrewed to check)
③The probe is frequently used in large quantities, the sensor is aging or damaged, burns, etc.
④Other host circuit components are faulty
4. Measurement without data change
① Whether the probe is well connected, whether the probe is damaged, etc.
② The relevant host line is faulty.


