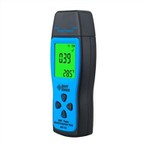
Why is the thickness gauge sometimes inaccurate?
This is a rather general question. Because there are various reasons for the inaccuracy of the instrument. For the coating thickness gauge alone, there are mainly the following reasons that cause inaccurate measurement.
(1) Interference of strong magnetic field. We have done a simple experiment, when the instrument works near the electromagnetic field of about 10,000 V, the measurement will be seriously disturbed. If it is very close to the electromagnetic field, there may be a crash phenomenon.
(2) Human factors. This situation often happens to new users. The reason why the coating thickness gauge can measure to the micron level is that it can take the small change of magnetic flux and convert it into a digital signal. If the user is not familiar with the instrument during the measurement of the instrument, the probe may deviate from the body under test, causing the magnetic flux to change and cause wrong measurement. Therefore, it is recommended that users and friends first master the measurement method when using the instrument for the first time. The placement of the probe has a great influence on the measurement. During the measurement, the probe should be kept perpendicular to the surface of the sample. And the probe should not be placed for too long, so as not to cause the interference of the magnetic field of the matrix itself. Answers to questions about influencing factors of coating thickness gauges
(3) An appropriate substrate was not selected during system calibration. The minimum plane of the substrate is 7mm, and the minimum thickness is 0.2mm. Measurements below this critical condition are unreliable. Answers to questions about influencing factors of coating thickness gauges
(4) The influence of attached substances. The instrument is sensitive to adhering substances that prevent the probe from making intimate contact with the overlay surface. Therefore, the attached substances must be removed to ensure that the probe is in direct contact with the surface of the covering layer. When performing system calibration, the surface of the selected substrate must also be bare and smooth. Answers to questions about influencing factors of coating thickness gauges
(5) The instrument fails. At this time, you can communicate with technicians or return to the factory for repair.


