Detailed explanation of the structure and usage of digital multimeterr
Multimeters, also known as multimeters, multimeters, three-meters, multimeters, etc., are indispensable measuring instruments in power electronics and other departments. Generally, the main purpose is to measure voltage, current and resistance.
Multimeters are divided into pointer multimeters and digital multimeters according to the display method. It is a multi-functional and multi-range measuring instrument. Generally, the multimeter can measure DC current, DC voltage, AC current, AC voltage, resistance and audio level, etc., and some can also measure AC current, capacitance, inductance and semiconductor. Some parameters (such as β) and so on.
The multimeter is a magnetoelectric instrument with a rectifier that can measure various electrical parameters such as AC and DC current, voltage and resistance. For each electrical quantity, there are generally several ranges.
Also known as multimeter or multimeter for short. The multimeter is composed of a magnetoelectric ammeter (meter head), a measuring circuit and a selection switch. Various electrical parameters can be measured conveniently by changing the selection switch. The main basis of its circuit calculation is the closed circuit Ohm's law. There are many types of multimeters, and they should be selected according to different requirements when using them.
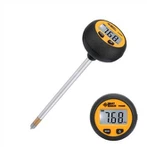
Multimeter Take the MF30 pointer multimeter and the DT840 digital multimeter as examples to understand their structure and performance, learn how to use the multimeter to correctly measure basic electricity such as voltage, current, and resistance, and be familiar with the precautions for use.
pointer multimeter
1. Structure of pointer multimeter
It is mainly composed of three parts: meter head, measuring circuit and transfer switch.
When using a pointer multimeter, pay attention to the following points:
(1) Before use, the gauge pointer should be zeroed.
(2) Before measurement, the transfer switch should be turned to the appropriate position according to the item and size of the measured electricity.
(3) After the measurement, the transfer switch should be turned to the highest AC voltage range, and some multimeters (such as 500 models) should be turned to the neutral position marked with ".".
2. Measurement of AC voltage
(1) Before measurement, turn the switch to the corresponding AC voltage range. If the voltage to be measured is not known in advance, the range should be at the highest level to avoid damage to the meter.
(2) When measuring, connect the test leads in parallel to both ends of the circuit under test or the component under test. It is strictly forbidden to toggle the switch to select the range during measurement.
(3) When measuring voltage, develop the habit of one-handed operation and concentrate on it.
(4) Since the AC voltage scale on the dial is calibrated according to sinusoidal alternating current, if the measured power is not sinusoidal, the error will be large.
(5) The frequency range of measurable AC voltage is generally 45HZ∽1000HZ, if it exceeds the range, the error will increase.
3. Measurement of DC voltage
The measurement method is basically the same as that of AC voltage, but the following two points should be noted:
(1) Same as measuring AC voltage, the switch should be set to the gear of DC voltage before measurement. If the voltage to be measured is unknown in advance, the range should be large rather than small; The circuit is connected in parallel, and it is not allowed to toggle the transfer switch during the measurement.
(2) When measuring, you must pay attention to the positive and negative polarities of the test leads. The red test lead is connected to the high potential end of the circuit under test, and the black test lead is connected to the low potential end. If the test leads are reversed, the pointer on the meter head will turn backwards, and it is easy to bend the pointer. If you don't know the potential level of the measured point, you can gently touch the test lead to the measured point. If the pointer is reversed, it means that the polarity of the test leads is reversed, just replace the test leads.
4. Measurement of DC current
(1) When measuring, the multimeter must be connected in series to the circuit under test and cannot be connected in parallel.
(2) Pay attention to the positive and negative polarity of the test leads. When measuring, the red test lead is connected to the high potential end of the circuit fracture, and the black test lead is connected to the low potential end.
(3) When the measured current is unknown, the measuring range should be large rather than small. It is strictly forbidden to toggle the switch to select the range during measurement.
5. Resistance measurement
(1) Correctly select the resistance multiplier file, so that the pointer is as close as possible to the geometric center of the scale, which can improve the accuracy of the measurement data.
(2) It is strictly forbidden to measure resistance when the circuit under test is charged.
(3) When measuring, directly connect the test leads across the two ends of the measured resistance or circuit. Be careful not to touch both ends of the resistance with your hands at the same time, so as to avoid the influence of human body resistance on the reading.
(4) When measuring the thermistor, it should be noted that the thermal effect of the current will change the resistance of the thermistor.