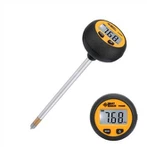
Differential pressure gauge instruction manual
1. Choose a location without violent vibration, and the surrounding temperature is not greater than 140 degrees Fahrenheit (or 60 degrees Celsius). Also, keep out of direct sunlight as the clear plastic cover will exacerbate fading. Excessive length of tubing will not affect accuracy but will delay response time, do not let these tubing get in the way. If the pulsating pressure or vibration causes the pointer to vibrate excessively, please contact the manufacturer for additional damping.
2. All standard differential pressure gauges have been calibrated by the longitudinal diaphragm, and the longitudinal operation of the instrument must be maintained to meet the highest accuracy requirements.
3. The ceiling is installed in a 120-degree circle to fix the mounting hole, and use mechanical screws of appropriate length.
4. Embedded installation: Drill a sized opening on the mounting plate. Insert the differential pressure gauge and secure with appropriate length machine screws and adapters.
5. Zero reset operation after installation: Use the external zero adjustment screw at the bottom of the cover to set the pointer exactly at the zero position. Note that zero checks and adjustments can be made from the vented high and low pressure manometer connections.
"Note" Overpressure protection: The maximum rated pressure of the standard differential pressure gauge is 15 psi, and it cannot be used under overpressure. When the overpressure value is close to 25 psi, the rubber plug shall not be used as a pressure relief valve at the end of the air outlet to discharge and decompress the pressure inside the instrument. In order to keep the pressure relief pipe unblocked, when the instrument is installed on the ceiling, the distance between the four gaskets should be kept at 0.023 inches, so as to avoid the gap blockage of these gaskets.
operate
1. Positive pressure: use a pipe to connect the pressure source to one of the two high-pressure holes and block the unconnected high-pressure holes. Vent one or both vent low pressure holes.
2. Negative pressure: use a tube to connect the vacuum or low pressure source to one of the two low pressure holes and block the unconnected low pressure hole. Vent one or both vent high pressure holes.
3. Differential pressure: Connect the slightly higher of the two high-pressure sources to the lower of the two low-pressure sources with pipes. And plug the unconnected outlet holes. If one end of the differential pressure gauge has a dirty vent, it is recommended that a filter vent plug be installed over the vent to keep the inside of the gauge clean.
A For temporary installation and portability, please use 18-pipe threaded rubber adapter and connect it to the pressure source with rubber or polyethylene pipe.
B For permanent installation, please use pipe thread above 14, and copper or aluminum pipe is recommended.
maintenance and repair
1. Check the model and specifications carefully before installation. When the pointer is not at zero, use a screwdriver to vertically adjust the slotted screw directly under the meter to make the pointer return to zero.
2. The instrument should be installed in the ambient temperature range of -15~60C, and used in an environment where the sharp pulsation of the side pressure has no effect on the correct reading
3. Note that the high and low end pressures must not be reversed, and the unilateral pressurization is not allowed to exceed the upper limit of the differential pressure range scale.
4. The instrument should be installed vertically, and try to maintain the same horizontal position as the pressure point
5. During the use of the instrument, it should always be kept dry and clean, and properly maintained.
6. Under the condition of normal use, the instrument should be inspected regularly, generally every six months is advisable.


