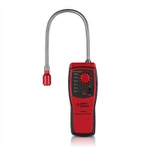
How to replace the battery of the digital lux meter
◆When the battery power is low, the "BT" indicator will appear on the LCD, indicating that the battery needs to be replaced.
◆Remove the power from all test terminals, and open the battery cover in the direction indicated by the arrow. Remove the battery from the battery buckle and replace it with a new 9V battery.
◆Close the battery cover.
Measurement methods:
◆Turn on the power.
◆Select the appropriate measurement gear.
◆Open the head cover of the light detector, and place the light detector at the horizontal position of the light source to be measured.
◆Read the measurement value of the lux meter LCD.
◆When reading the measured value, if the left high digit "1" is displayed, it means that the overload phenomenon should be selected immediately.
◆When setting the file position of 20000LUX/fc, the displayed reading value must be ×10 times to be the true value of the measurement. When setting the 200,000LUX file position, the displayed reading value must be ×100 times to be the true value of the measurement.
◆Reading value lock switch: Press the HOLD switch once, the LCD will display the "H" symbol, and display the locked value. Press the HOLD switch again to cancel the reading lock function.
◆Peak lock: To measure optical pulse signal, press PEAK switch once, LCD will display "P" symbol and pulse peak value. Press the PEAK switch again to return to the normal test.
◆After the measurement work is completed, put the light detector head cover back, and switch the power switch to OFF.
Maintenance items:
◆Do not measure under high temperature and high humidity.
◆When in use, the photodetector must be kept clean.
◆The light source test reference level is at the top of the light-receiving sphere.
◆The sensitivity of the photodetector will decrease due to usage conditions or time. It is recommended that you calibrate the meter regularly to maintain basic accuracy.
Maintenance
1. Do not measure in high temperature or high temperature places.
2. When in use, the photodetector should be kept clean.
3. The light source test reference level is at the top of the light-receiving sphere.
4. The sensitivity of the photodetector will be reduced due to usage conditions or time. It is recommended that you calibrate the meter regularly to maintain the basic accuracy.


