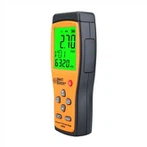
Introduction to Instructions for Using a Multimeter
Taking the MF30 multimeter as an example, explain the reading of the multimeter. The first scale line indicates the resistance value, with infinity at the far left and zero at the right, and uneven scales in the middle. There are resistance levels of R × 1, R × 10, R × 100, R × 1K, and R × 10K, which indicate the multiple of the scale indication to obtain the actual resistance value (in ohms).
For example, when measuring a resistor in the R × 100 range and the pointer indicates "10", its resistance value is 10 × 100=1000, which is 1K. The second scale line is shared between the 500V and 500mA ranges. It should be noted that the indication principle of the voltage and current ranges is different from that of the resistance range. For example, the 5V range indicates that this range can only measure voltage below 5V, and the 500mA range can only measure current below 500mA. If it exceeds the range, it will damage the multimeter.
Attention: The multimeter should be placed horizontally when in use. Insert the red probe into the+hole and the black probe into the - hole. Test the current using the current mode, and do not misuse the voltage mode or resistance mode. The same applies to other modes, otherwise the fuse inside the multimeter may be burned, and the meter head may be damaged. Without knowing the range beforehand, try measuring with the maximum range, then disconnect the measurement circuit and shift gears. Never switch the range while online. If the pointer quickly deflects to the bottom, the circuit should be disconnected immediately for inspection.
Finally, there is another rule, which is to set the range switch of the multimeter to the highest AC voltage after use, in order to prevent others from accidentally measuring the 220V mains voltage and damaging it.


