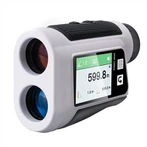
Working conditions and principle of electronic level meter
The electronic level is a measuring instrument with a base measuring surface, which uses the balance principle of the capacitance pendulum to measure the small inclination angle of the measured surface relative to the horizontal plane.
definition
It is a measuring instrument that has a base measuring surface and uses the balance principle of a capacitive pendulum to measure the slight inclination angle of the side relative to the horizontal plane. Among them, the instrument that indicates the measured value with a pointer indicating device is called a pointer electronic level, and the instrument that indicates the measured value with a digital indicating device is called a digital electronic level.
Extended range device
If the instrument is already at the limit position of the measurement, it is readjusted to the zero position, so that a larger range of measurement can be performed at this horizontal position.
Adjustment device
The device by which the instrument is adjusted to zero (zero or relative zero).
principle
There are two types of electronic levels: inductive and capacitive. According to different measurement directions, it can also be divided into one-dimensional and two-dimensional electronic levels.
Inductive principle: When the base of the level is tilted due to the inclination of the workpiece to be measured, the voltage of the induction coil changes due to the movement of the internal pendulum. The measurement principle of the capacitive level is that a circular pendulum hangs freely on a thin wire. The pendulum is affected by the gravity of the center of the earth and is suspended in a frictionless state. There are electrodes on both sides of the pendulum and the capacitance is equal when the gap is the same. If the level is affected by the workpiece to be measured, the different distances between the two gaps will produce different capacitances and angle differences.
Instrument working conditions
The instrument works at 15~25°C.
2. Appearance
The working surface of the instrument must not have trachoma, pores, bruises, scratches, burrs, rust and other defects that affect the use; the exposed non-working surface must not have pores, trachoma, cracks, rust and other obvious defects.
The electroplating layer of the instrument should be uniform and smooth. The painted surface of the instrument must not have obvious defects such as paint peeling, spots, scratches and uneven color that affect the appearance quality.
All the engraved lines, numbers and signs of the instrument should be clear. The connection between the sensor and the indicator (or display) and the connector should be intact and reliable.
The surface of the plastic shell and handle of the instrument is uniform in color, smooth and beautiful, without defects such as bubbles and cracks.
3. Tilt change
When the instrument sensor is uniformly tilted, the indicator (or display) should be able to change smoothly accordingly.
The zero adjustment device and the extended range device of the instrument work stably and reliably.
4. Requirements for parts
The surface roughness Ra value of the working surface of the grinding instrument should not be greater than 0.4 μm.
The number of bonding points on the working surface of the scraping instrument shall not be less than 25 within the range of 25mm×25mm.
5. The hardness of the working surface of the instrument shall not be lower than 180HB.
6. The instrument should be subjected to high temperature test, low temperature test and continuous impact test under the conditions of transportation and packaging.


