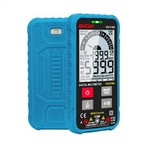
Measurement steps and skills of clamp ammeter
The clamp ammeter is composed of a current transformer and an ammeter. It is an instrument used to measure the current of a running electrical circuit, and it can measure the alternating current without power failure.
The iron core of the transformer is made into a movable opening and is shaped like a pincer, and the movable part is connected with the handle. When the handle is gripped tightly, the iron core of the current transformer opens (as shown by the double-dot dash line in the figure), and the wire to be tested can be placed in the jaws, and the current-carrying wire becomes the primary winding of the current transformer. When the jaws are closed, an alternating magnetic flux passes through the iron core of the current transformer, and an induced current is generated in the secondary winding of the transformer. ) The ammeter is connected to both ends of the secondary winding, and the current indicated by its pointer is proportional to the working current clamped into the current-carrying wire, and the measured current value can be read directly from the dial. The clamp ammeter is essentially composed of a current transformer, a clamp wrench and a rectifying magnetoelectric reaction force meter.
Measuring method of clamp ammeter
1. Preparation before the test
Take a look at the jaws. The jaws of the instrument should be clean. If there is any debris or oil, it should be cleaned up in time to ensure that the magnetic circuit is strictly closed and the measurement results are accurate. Second, look at the pointer. Observe the position of the pointer, if it is not at zero, perform mechanical zero adjustment.
2. Measurement steps
Step 1: Select the range
First, estimate the size of the measured current, and adjust the switch to the required measurement file. If it is impossible to estimate the magnitude of the measured current, first measure with the highest range file, and then adjust to an appropriate range according to the measurement situation.
The second step: opening line
The essentials of operation are to hold the handle tightly, open the jaws, and place the wire under test. In order to reduce errors, the measured wire should be placed in the center of the jaws.
Step Three: Closed Reading
Release the handle, the jaws will naturally return to the state of close contact, and read the display after the pointer is stable. If there is noise, check whether the jaws are in tight contact, or do it again.
Step 4: Go offline
Hold the handle tightly and open the jaws so that the clamp meter is away from the wire. After the measurement is completed, turn the selection range switch to the maximum range position.
Precautions for the use of clamp ammeter
1) The voltage of the circuit under test should be lower than the rated voltage of the clamp ammeter.
2) When measuring the current of a high-voltage line, wear insulating gloves, wear insulating shoes, and stand on an insulating mat.
3) The jaws should be closed tightly and the range cannot be switched with power on.
4) The measuring range should be selected appropriately. When selecting the range, you should choose the large range first, and then choose the small range or see the nameplate value for estimation.
5) Place the wire in the center of the jaws.
6) After the measurement, put the changeover switch at the most range.
Measuring skills of clamp ammeter
When measuring a small current below 5A, in order to improve the measurement accuracy, if conditions permit, the measured wire can be wound several times, and then put into the jaw for measurement. At this time, the actual current should be the meter reading divided by the number of wire coils placed in the jaws.