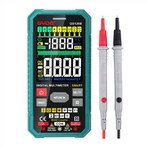
MPO Method for Coating Thickness Gauge Calibration
Such as: 1. Copper, chromium, zinc and other electroplating layers or paint, paint, enamel and other coating thicknesses on steel materials.
2. Thickness of aluminum, copper, gold and other foil and strip materials, paper and plastic film.
3. Coating thickness on non-ferrous metal materials such as copper, aluminum, magnesium, zinc, etc.
4. Thickness of anodized film on aluminum and magnesium materials.
5. Thickness of thermal spray coating on various steel and non-ferrous metal materials.
Coating thickness gauge MPO calibration method:
1 Switches the instrument on/off
Note: The instrument does not have a dedicated switch.
Turn on the instrument
- Automatically turns on when the instrument is placed on the workpiece. If the instrument is placed on a non-ferromagnetic or non-conductive material, the display will show "Er6" followed by four horizontal dashes without any reading.
- Another way to turn on the power is to press the [OK] key.
Please note!
Do not switch on the instrument by pressing the sensor with your finger! This may lead to erroneous measurement results.
Turn off the instrument / auto shut off
The instrument will automatically shut down after one minute of inactivity. (OFF = instrument does not display anything).
Measuring Coating Thickness
1. After the instrument is turned on, place the instrument on the workpiece to be measured and wait for the instrument to make a measurement sound. This way the instrument can be turned on automatically.
2. Lift the instrument off the workpiece.
The reading is displayed after the sound is measured. Note: If the instrument is lifted too early (before there is a sound), the error message “Er6” will appear. Repeat step 1.
3. When the instrument is already on, the reading will be displayed immediately. It will be displayed when the instrument is placed on the measuring workpiece and after it is lifted.
Measured with MP0
Display the measurement data stored in the instrument
The instrument can store up to 999 measurement data.
1. Use [5] key or [6] key to scroll through the measurement data.
2. After turning over the first or last measurement data, the screen will display "- - - - " for about 1 second.
You can continue measuring at any time.
Delete all measurement data
1. Press the [5] or [6] key.
2. Press the [CAL] key.
"del" to delete will be displayed for 2 seconds.
3. Press the [OK] key while “del” is displayed.
All measurement data in the instrument will be deleted.
Pressing the [OK] key when “del” is not displayed will have no effect.
Normalized
Normalization is used to make adjustments to measuring instruments. Normalization requires an unplated substrate, and the shape and material of the substrate must be consistent with the workpiece being measured.
Note: Normalization will delete all memory data.
Normalize the instrument (prerequisite: the instrument is turned on)
1. Press the [CAL] key. "Base" (i.e. "unplated substrate") is displayed.
2. Measure about five times on the substrate
After each measurement, the current reading is displayed.
3. Press the [OK] key twice.
The screen shows "Er17", ignore it.
Complete the normalization procedure.
(Coating thickness gauge MPO calibration method) steps;
calibration
Calibration requires the following items: substrate (the shape and material of the substrate should be consistent with the part to be tested) and a standard piece (the standard piece of about 75 µm randomly provided by the instrument). Note: Calibration will delete all readings in memory.
Calibrate the instrument (prerequisite: the instrument must be switched on)
1. Press the [CAL] key.
Display "Base" (i.e. "unplated substrate")
2. Measure about five times on the substrate.
After each measurement, the current reading is displayed.
3. Press the [OK] key.
Displays 0.00 and STD1 (ie Calibration Standard # 1).
4. Put the calibration standard on the substrate and measure about 5 times.
After each measurement, the current reading is displayed on the screen.
5. Use the [5] or [6] key to adjust the last value in step 4 to the nominal value of the standard sheet, such as "75 µm". The nominal value of the standard sheet is indicated on the standard sheet.
6. Press the [OK] key.
The calibration procedure is completed. The instrument returns to the measurement state.
Delete calibration data / restore original curve
Sometimes, if the instrument measurements are still inaccurate after calibration, the calibration parameters can be deleted. This can happen if previous calibration procedures were not performed correctly.
In this case, the characteristic curve can be restored to the original factory setting.
Delete the calibration parameters of the instrument (prerequisite: the instrument must be turned on)
1. Press the [CAL] key. "Base" will be displayed on the screen.
2. Measure about 5 times on the substrate.
3. Press the [OK] key. “STD1” (Calibration Standard # 1) is displayed.
4. Measure 1 time on the substrate.
The screen will show a reading around 0.
5. Use [5] or [6] key to adjust STD1 to 0.00.
The screen will display “0.00 STD1” .
6. Press the [OK] key. Return to the original characteristic curve.
Restoration complete. The instrument is now ready to measure.