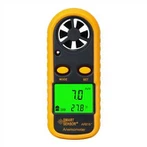
[Multimeter knowledge sharing] Three common problems with multimeters
1. Firstly, disconnect the connecting wires and short connectors of the six heads of the motor, and use the ohm range of the multimeter to find any set of windings.
2. Turn the multimeter to the smallest milliampere level and connect it to both ends of this winding.
3. Then, slowly and evenly rotate the rotor of the motor once, and check how many times the pointer of the multimeter swings left and right. If it swings once, it means that the current changes positive and negative for one cycle, which is a two pole motor. For the same reason, swinging twice is a four pole motor, and swinging three times is a six pole motor. By analogy, the milliampere range of the multimeter can be used to rotate the motor once, and the pointer can swing several times to determine which pole the motor is, thus knowing the approximate speed of the motor (i.e. slightly lower than the synchronous speed).
We know the relationship between the synchronous speed of an electric motor and the number of magnetic poles. When the frequency is 50Hz, the two poles are 3000 revolutions per minute, the four poles are 1500 revolutions per minute, the six poles are 1000 revolutions per minute, and so on. The formula is: N=6000/P (under the condition of 50Hz power frequency, N is the synchronous speed and P is the number of poles of the motor).
Distinguish between the head and tail of AC motor windings:
You can use a multimeter to first distinguish the 6 wire ends, divide the two connected wire ends into one phase, and then divide the 6 wire ends into three phases. Then, determine the head and tail of the winding. The specific method is to set the DC milliampere range of the multimeter to the minimum level, and connect the probe to one of the two ends of the three-phase winding, while connecting the positive and negative terminals of the battery to the two wire ends of the other phase. As shown in the figure, when the switch is closed, if the pointer swings towards zero, it indicates that the wire end connected to the negative terminal of the battery and the wire end connected to the multimeter probe are the same end (both can be considered as heads). By analogy, the heads and tails of the other two phases can be measured.
The multimeter inspection method or winding series inspection method can be used; For example, using the winding series connection inspection method, connect any two phases of windings in series with a light bulb, and then connect 220V AC voltage to the third phase winding [36V for large and medium-sized motors]. If the light bulb lights up, it means that the ends of these two phases of windings are correct. If the light bulb does not light up, it means that these two phases are incorrect. You can swap the ends of one phase and try again. After confirming these two ends, you can use this method to find the ends of the third phase.
For example, using the multimeter inspection method, assuming that the windings are D1-D2, D3-D4, D5-D6, and D1-D2, a dry battery is placed in the winding. D1 is connected to the negative pole, D2 is connected to the positive pole, and a switch is placed between D2 and the positive pole of the battery. D5 is connected to the negative pole of the multimeter, and D6 is connected to the positive pole of the multimeter. The multimeter is set to milliampere range. When the switch is turned on, if the multimeter pointer swings to the side greater than 0, then the positive terminal of the battery and the positive terminal of the multimeter are connected to the same head or tail; If the pointer swings in the opposite direction, the positive terminal of the battery and the negative terminal of the multimeter are connected to the same head or tail. Connect the battery and multimeter to the two terminals of the other phase for testing, to determine the head and tail of each phase