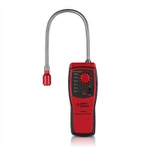
The main application of eddy current thickness measurement
The eddy current thickness measurement method is mainly used in the measurement of various non-metallic coatings on metal substrates. Using high-frequency alternating current to generate an electromagnetic field in the coil of the probe, when the probe is close to a conductive metal body, an eddy current is formed in the metal material, and increases as the distance from the metal body decreases, and the eddy current will affect the probe coil The magnetic flux, so the amount of feedback is a measure of the distance between the probe and the base metal, because the probe is used to measure the thickness of the coating on the non-ferromagnetic metal substrate, so we usually call the probe a non-magnetic Probe. Non-magnetic probes generally use high-frequency and high-permeability materials as coil cores, often made of platinum-nickel alloys and other new materials. Compared with the magnetic measurement principle, their electrical principle is basically the same, the main difference is that the probe is different, the frequency of the test current is different, and the signal size and scale relationship are different. In the latest thickness gauge, through continuous improvement of the probe structure, in conjunction with microcomputer technology, different control programs are called by automatically identifying different probes, different test currents are output respectively, and the scale conversion software is changed. Finally, the two Different types of gauges can be connected to the same thickness gauge, which reduces the burden on users. Based on the same idea, the thickness gauge that can be connected with up to 10 kinds of side heads greatly expands the thickness measurement range (up to 100,000 times or more) ), which can measure the non-magnetic coating on the surface of the magnetic conductive material, the non-conductive coating on the conductive material and the conductive layer on the non-conductive material, which basically meets the needs of most industries in industrial production.
The thickness gauge using the principle of eddy current, in principle, can measure the non-conductor coating on all conductors, such as the paint, plastic coating and anode on the surface of aerospace vehicles, vehicles, household appliances, aluminum alloy doors and windows and other aluminum products. Oxide film. Some special purposes such as diamond coating on certain metals and other sputtered non-conductive layers. The cladding material can also have a certain conductivity, which can also be measured through calibration, but the ratio of the conductivity of the two is required to be at least 3 to 5 times different (such as chrome plating on copper).
The principle of calibration is that the calibration sample without coating and the base material of the measured object should have the same composition, the same thickness (mainly when the thickness is less than the minimum value specified by the instrument about 0.5mm), and the same radius of curvature, If the measured area is smaller than the requirements of the technical parameters of the instrument (less than about 20mm in diameter), the same measured area should also be available. If the coating contains conductive components, the coating of the calibration sample should also have the same conductivity as the coating of the measured object. After the coating of the calibration sample has been tested by other methods (including destructive testing methods), the thickness is calibrated or the calibrated calibration sheet is used as the coating, and the thickness gauge can be calibrated on it according to the method in the manual. After calibration, rapid non-destructive testing can be performed on the product under test. Calibration sheets are generally made of triacetate film or hard paper impregnated with phenolic resin.


