What are the calibration methods for coating thickness gauges?
What are the calibration methods for coating thickness gauges? There are three main calibration methods for coating thickness gauges, namely system calibration, two-point calibration and iron-based calibration. Under normal circumstances, only iron-based calibration is required for accurate measurement. When the magnetism and surface roughness of the iron base of the instrument and the iron base of the measured object are greatly different, system calibration can be performed to ensure the measurement accuracy. Next, we will introduce the method of calibrating the coating thickness gauge in detail.
(1) Iron-based calibration
The magnetic properties and surface roughness of the standard base metal of the instrument shall be similar to those of the base metal of the test piece. In order to ensure the accuracy of the measurement, an iron-based calibration can be performed before measuring the test piece.
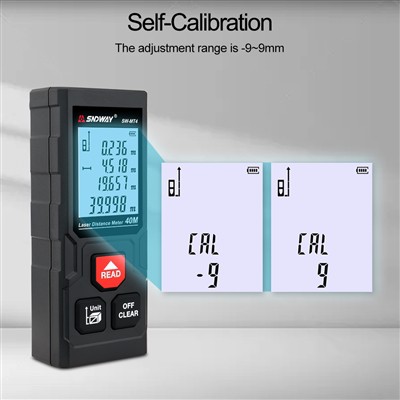
Calibration method: After the instrument is turned on, first place the probe on the exposed substrate of the test piece to measure, measure twice, press the "CAL" key while holding down the probe for the second time after the second measurement, and then Iron based calibration can be done. If there are no two beeps, it means that the operation is wrong. Repeat the above steps until two beeps are heard.
(2) Two-point calibration
During the measurement process, if it is found that the deviation of individual measured values is large, it can be adjusted by two-point calibration method.
Calibration method: measure a test piece with a known thickness as a standard sample, if the displayed value is inconsistent with the real value, you can use the "▲" and "▼" keys to add or subtract 1. Press and hold the "▲" and "▼" keys to perform continuous addition and subtraction until the displayed value is the same as the actual value. Normal measurement can be performed after the calibration is completed.
Note: The thickness of the test piece selected during the two-point calibration should not be close to the value of the five samples during the system calibration, otherwise the operation will be invalid.
When the calibration of the fifth sample is completed, the screen will display "0000'', and enter the boot interface as shown in Figure A. The instrument has now completed the system calibration process. Afterwards, the DUT can be directly measured.
Note: These five samples can use the provided standard sheets or samples with known thickness as standard sheets. Calibration of samples should be carried out in order from small to large, and there should be a certain difference between adjacent samples.