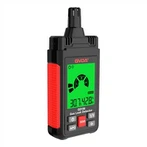
Coating Thickness Gauge Power-On Calibration Procedure
1. Calibration - base calibration
Put the instrument firmly and fit on two (there is only one iron base, and if the test results on the base are all 0, then you can directly take the calibration sheet for testing, or directly test the customer's product; if the test base results have a value Yes, press the "ZERO (on the left side of the power button," key to return to zero and then test the base (cannot be calibrated on the calibration sheet, otherwise a negative number will appear, and the test base will display 0, indicating that the calibration is successful. If there is still a value, you can repeat the above reset) Zero steps until the calibration value is 0.
Example: Test 3.0 (or any other value) on an iron or aluminum substrate, then press "ZERO" to reset to zero and then test it on the corresponding iron or aluminum substrate. If it is 0, it means the calibration is successful. If there is a value, please repeat The above steps until the test base is 0
(In general, the product can be tested normally after the substrate calibration is completed. Some customers need to further verify the accuracy of the data, and can complete the next "calibration sheet calibration/correction" steps,
2. Calibration sheet - calibration/correction
Test the calibration sheet, the value is within the deviation range, and the customer's product can be directly tested
Test the calibration sheet, if the value deviation is large, press the "up button" and "down button" (up and down two buttons on the power button, the corrected value is the value of the calibration sheet (or close to the value of the calibration sheet, and then put it on the calibration sheet of the corresponding value) Chip test (you can't directly measure the base, otherwise there will be negative numbers. The above steps can be repeated several times until the value is within the normal error.
Example: the value of the calibration sheet is 50, the instrument measures 40, press the up button to correct the value to "50", and then put it on the 50 calibration sheet for testing (it cannot be placed on the substrate, if the value is within the deviation range, it means that the value is calibrated Successful, can directly test customer products;
If the value of the calibration sheet is 50, the instrument measures 60, press the key to correct the value to "50", and then test the calibration sheet.
3. Restore factory settings
When the operation is wrong and you don’t know how to correct it, you can press and hold the "upper left key" and "upper right key" at the same time (the two prominent semicircles of the panda will appear in English to prompt whether to calibrate, use the up and down keys to select "YES", and then press "Unit switch button" (on the right side of the switch button, to confirm the factory settings, and then follow the calibration steps to calibrate and it can be used normally.