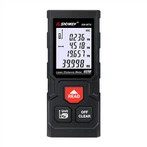
Troubleshooting instructions for digital multimeters
A simple guide for troubleshooting a digital multimeter: We use the principle of analog-to-digital conversion to convert the measured quantity into a digital quantity and display the measurement results in digital form as a measuring instrument. Compared with pointer type multimeters, digital multimeters are widely used due to their high accuracy, fast speed, large input impedance, digital display, accurate reading, strong anti-interference ability, and high degree of measurement automation. But if used improperly, it can easily cause malfunctions. This article takes the DT2201D digital multimeter as an example to discuss the general troubleshooting methods for digital multimeter faults.
Troubleshooting a digital multimeter should generally start with the power supply. For example, after turning on the power, if the LCD display is displayed, the voltage of the 9V stacked battery should be checked first to see if it is too low; Is the battery lead disconnected. Finding faults should follow the order of "inside first, then outside, easy first, then difficult". The troubleshooting of a digital multimeter can be roughly carried out as follows.
1, Visual inspection. You can touch the temperature rise of the battery, resistor, transistor, and integrated block by hand to see if it is too high. If the newly installed battery heats up, it indicates that the circuit may be short circuited. In addition, it is necessary to observe whether the circuit is disconnected, desoldered, mechanically damaged, etc.
2, Detect the working voltage at all levels. Detect the working voltage at each point and compare it with the normal value. Firstly, ensure the accuracy of the reference voltage. It is recommended to use a similar or identical number 10000
Measure and compare using a meter.
3, Waveform analysis. Observe the voltage waveform, amplitude, period (frequency), etc. of each key point in the circuit using an electronic oscilloscope. For example, if the clock oscillator is on and the oscillation frequency is 40kHz. If the oscillator has no output, it indicates that the internal inverter of DT2201D is damaged, or it may be due to an open circuit in external components. The waveform observed at the foot of DT2201D should be a 50Hz square wave, otherwise it may be due to damage to the internal 200 divider.
4, Measure component parameters. For components within the fault range, online or offline measurements should be conducted, and parameter values should be analyzed. When measuring resistance online, the influence of the components connected in parallel with it should be considered.
5, Hidden fault elimination. Implicit faults refer to faults that appear and disappear from time to time, and the instruments are sometimes good or bad. This type of malfunction is quite complex, and common causes include solder joints being poorly soldered, loose, loose connectors, poor contact of the adapter switch, unstable component performance, and continuous breakage of leads. In addition, it also includes factors caused by external factors. If the ambient temperature is too high, humidity is too high, or there are intermittent strong interference signals nearby, etc.